Fever Queen II
フィーバー クイーン
II (Fever Queen II)
Sankyo -
Stellar 2000 Frame, 1993
After getting back
into the pachi community due to picking up an Ultraseven pachislo and
very graciously being able to obtain a Fever Densha de Go!, I was on
the prowl for pachinko locally once again in October of
2022. I happened upon a craigslist posting during a work break,
maybe ten minutes after it went live. The listing was for a lot
of four pachinko machines for $160 - a pretty crazy value no matter how
you look at it. He was a little further up the bay and offered
door-to-door delivery for $200 all said and done. I couldn't pass
that up so I went for it.
The seller
said he used to import pachinko machines in the mid - late 1990's and
consign them to Bay Area toy stores (Talbots, Kiddie World, etc.) as a
side business while in college. The four machines on offer were
ones he kept for himself but never got around to really doing much
with. After having them in storage for 20+ years he decided to
part with them.
In the back of
my mind I expected them to be pristine for whatever reason, although
there's no way something packed away for that long would be as
such. Three of the four machines were straight up what one should
have expected, imported parlor pulls that had been packed into storage
for a couple decades - so the grime of their parlor days + years of
sitting in storage had grimed them up pretty good. That's just
how it was back then, and is still depending on who you import from,
with minimal refurbishment outside of a quick wipe down.
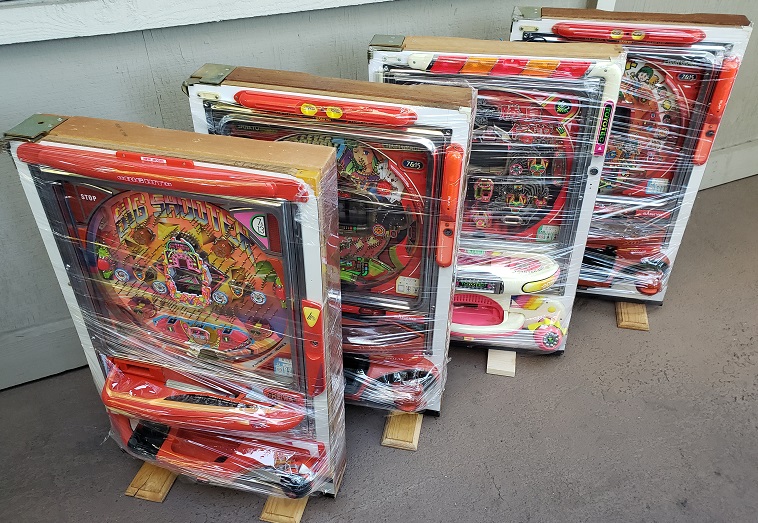
Two of the
machines were still wrapped as they were from way back when, and one of
them had a container of 1000 or so balls stretch wrapped to the bottom
as well. One of the four machines was pretty rough and it looked
as if it had been exposed to the elements a little compared to the
others. The gentleman who sold them was great to talk with and
hear a bit of his history with pachinko. Surprisingly enough it
is so rare when I encounter anyone in the Bay Area who even knows what
pachinko is, let alone had a part in the history of consumer importing
and sales in the region. You would think it'd be the total
opposite but it just seems it is something that very few here are
interested in.
The four
machines were:
New Big Shooter
ニュービッグシューター
Fever Queen II
フィーバー クイーン II
Bout Legend 2
勝負伝説 2
Fever Powerful
III
フィーバーパワフル III
My thought was
I'd give the machines quick rebuilds, maybe keep two for myself, and
sell the other two to friends for $100 each, making back my money. However I
realized pretty quickly that I bit off more than I could chew.
New Big Shooter was super clean and I really liked its earlier era
design but realistically I didn't have the space for more than one
machine (really don't have that either). I decided to keep the
one out of the lot I liked most, Fever
Queen II, and relist the other three. I paid it forward
and listed the other three machines locally for $50, and they sold the
next morning. I kept the balls that were attached to the one
machine, came to around 900 or so after tossing a layer of rusted ones
at the bottom of the tray, and the others cleaned / polished no
problem, so I figured I did alright all things considered.
I intended to
fully tear down, clean, and rebuild the Fever Queen II and go all out
on its restoration - kinda like what I did with the Ultraseven pachislo
I picked up a few months prior. After all, it couldn't be all
that dirty, right? I mean, it was carton fresh from being
imported over twenty years ago...

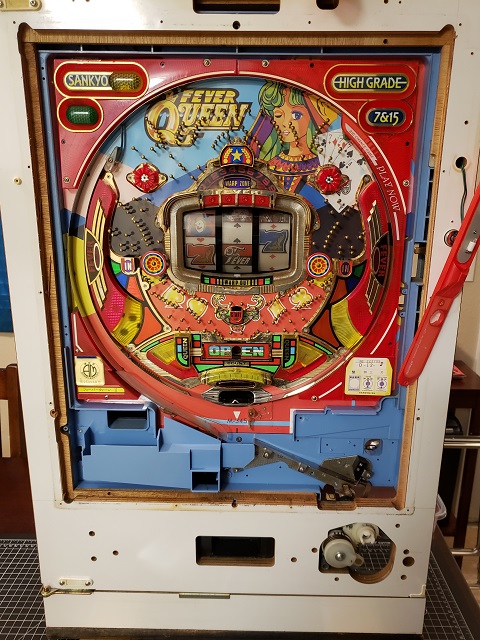
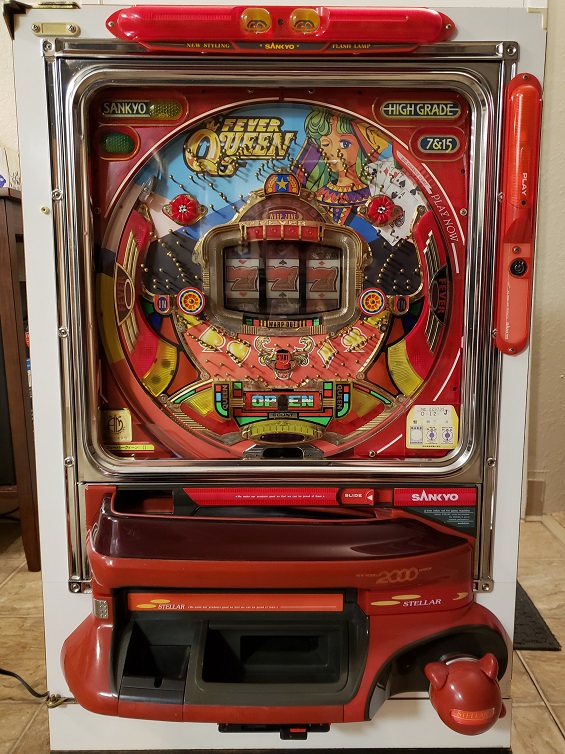
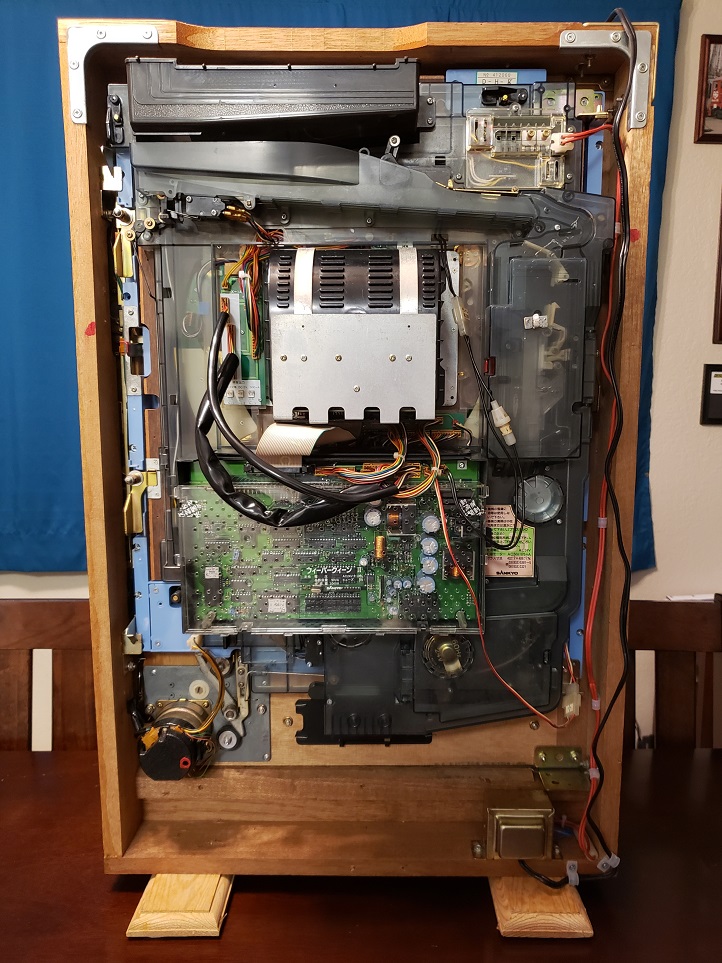
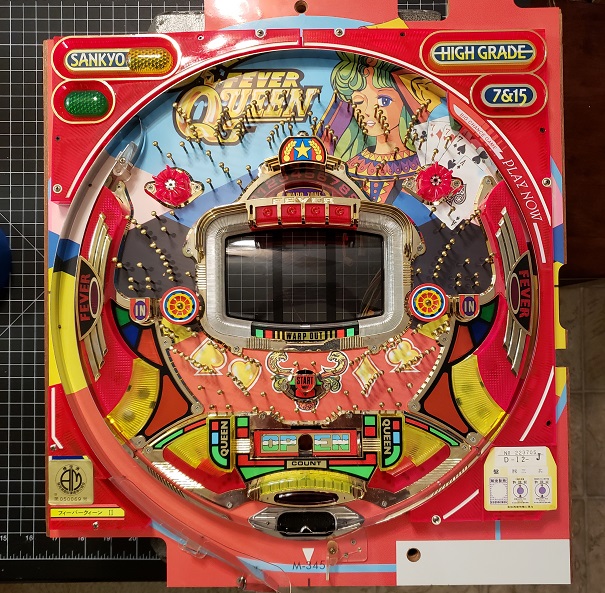
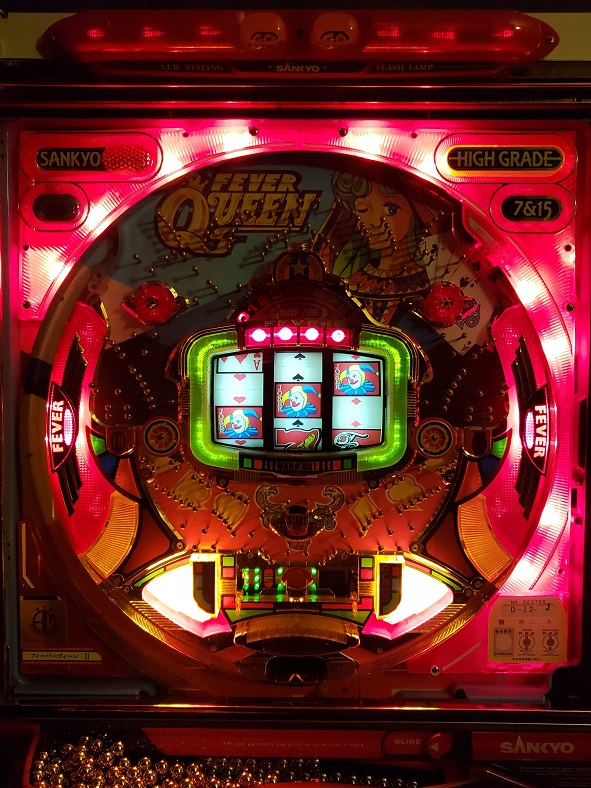
On first pass, the machine looks exceptionally clean from the front.
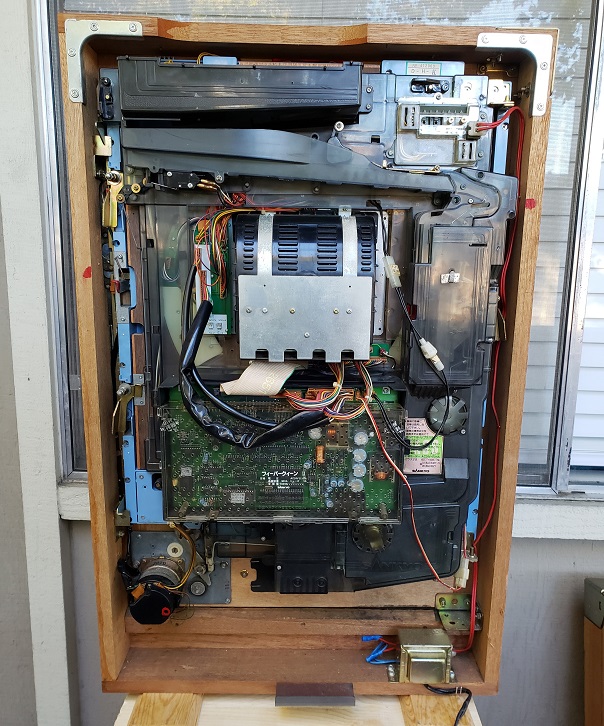
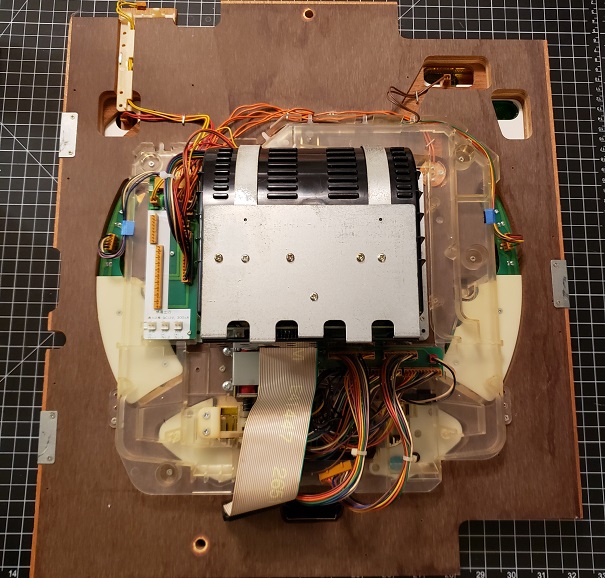
And the back looks pretty god
as well, except for the black area on the wood in the lower right...
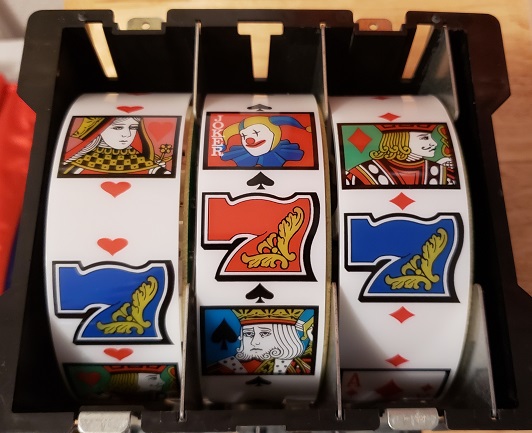
It's a pretty
cool machine, featuring three physical slot reels as the center
attraction with a playing card theme. There are a couple art
packages and the plastic colors seem to be mixed and matched between
them, with the paring on this machine the one I like most. The
artwork reminds me of 60's pinball style. Apparently it's a
popular series, with modern Fever Queen machines still being produced
to this day.
After a quick
wipe down the first order of business was to take the shooter handle
and lower tray assemblies off for full disassembly and cleaning.
Of course this was all pretty filthy and every part got stripped and
cleaned.
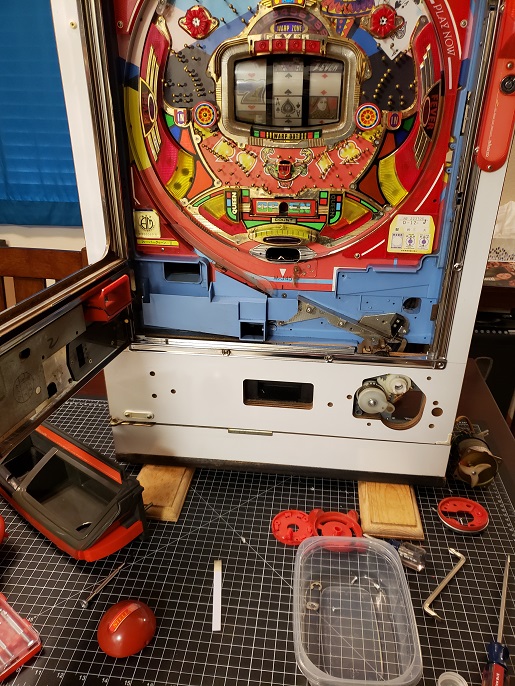
Removing the shooter handle and lower tray.
Once getting
the lower tray disassembled I was surprised to find not just the usual
grime and nicotine staining, but ASH -
tons and tons of ash. Nearly two handfuls of ash had become
trapped within the plastics. There was also an unusual amount of
cigarette tar on everything. I've rebuilt pachinko, arcade games,
consoles, and now slot machines... but I've never encountered anything
like that.
That's not mold nor spores but cigarette ash absolutely caked on
everything.
It was simply
crazy. Everything got a full wash and scrub. Upper tray
wasn't much better, and I have no idea why Sankyo thought the best
place to locate the speaker was RIGHT ABOVE the ashtray, with an open
speaker grille. The speaker was filthy as well, as was the volume
adjustment board. The speaker cone became about 100x louder after
having all the grime and tar cleaned off it. Remember, this was a
machine still packed from import over twenty years ago, this is how the
exporter sent it out for sale.
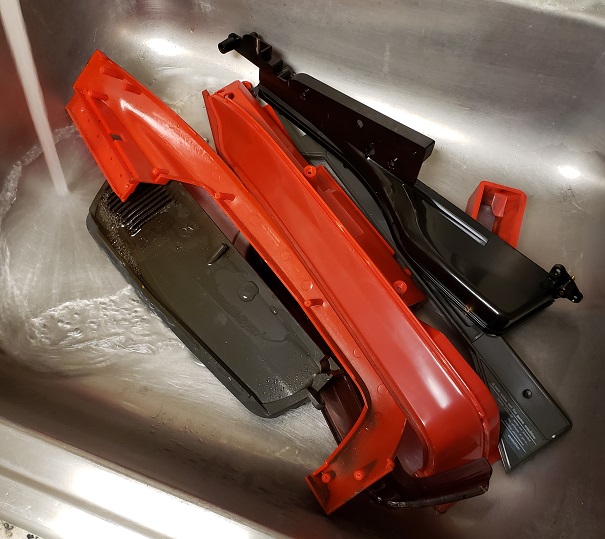
Bath time - everything got a total and complete washing.
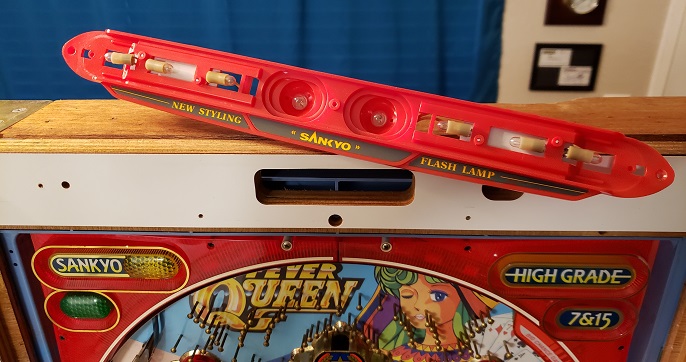
A couple days
later I stripped off the chrome and light bars. I got the rust
and grime cleaned out as much as possible but the chrome itself is in
really nice shape, no pitting or other wear, so it didn't need any
extra work on the surface.
The light bars
also got fully disassembled and cleaned inside and out.
Thankfully all the lamps looked to be in good order, which was nice to
see as they don't appear to be the easiest to replace.
With that the
front of the machine was done, it all cleaned up really well and I'm
glad to have all that ash and grime gone!
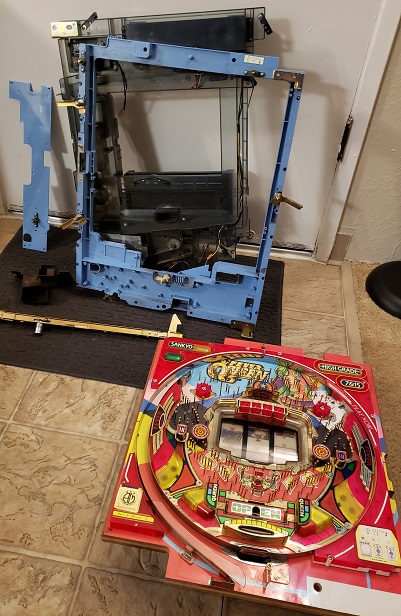
A couple days
later I decided to get to work on the inside of the machine and
stripped it down to just the wood. Even though the machine is
from 1993 it is a cell game in Sankyo's Stellar 2000 frame, which meant
tearing it down would be easier than a straight up vintage
machine. I went through and made sure the cabinet was
structurally sound and that all the fasteners were tight.
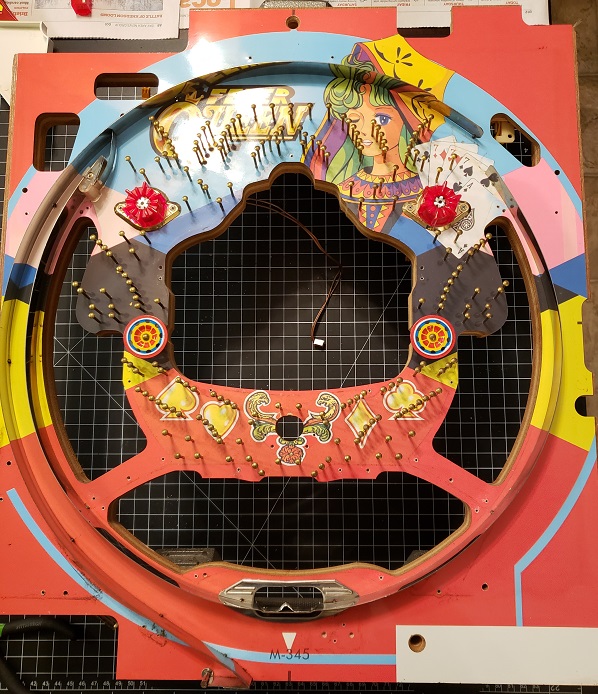
First order of
business was to clean the internal frame, so that would be all the blue
parts. Again, pretty crazy how much ash had built up on the
plastics but it all cleaned up pretty nice - and as before, glad to
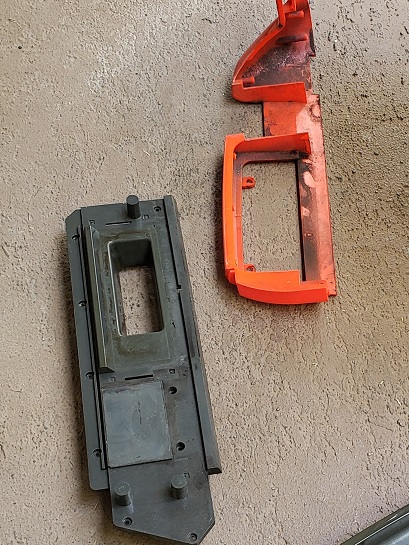
have all that ash and grime gone! The blue and black parts above
are part of the frame, which sandwich the cell, the red playfield
above, between them.

The internal frame and cell reinstalled in the cabinet,.
Here's a
before and after of the lower part of the internal frame, again it's
not mold or water staining, it's ash...
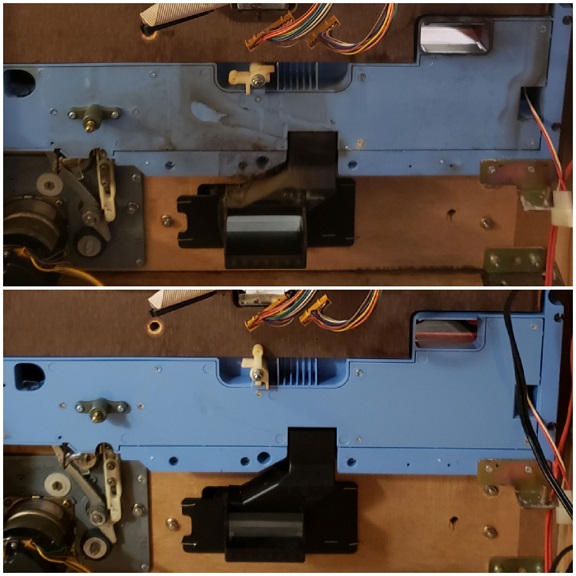
The black on the wood seen
before wasn't mold - it was even more ash.
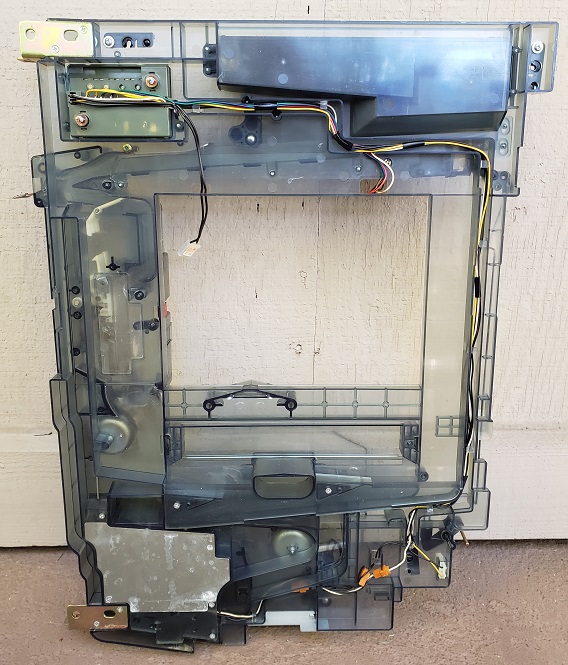
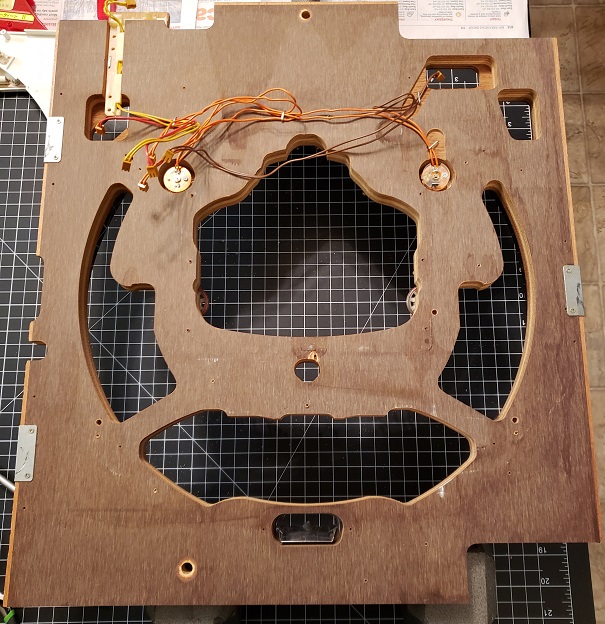
Next it was
time to address the back of the frame, the area where all the balls
travel - whether they follow paths down after coming through the
playfield, or are awarded from the hopper up top and through the front
as payouts. On most pachinko machines this is the dirtiest part,
which makes sense, as it's where all the balls roll through. In
the case of this machine, as dirty as the back of the frame was, it was
nothing compared to all the ash in the front. I tore it down
completely, every part cleaned, and any part that could go into the
sink to be scrubbed with dish liquid was given that treatment. If
I were to go hardcore I guess I could have bent new rods and so forth
but everything cleaned up well enough eventually.
The back of the frame being torn down in preparation for cleaning.
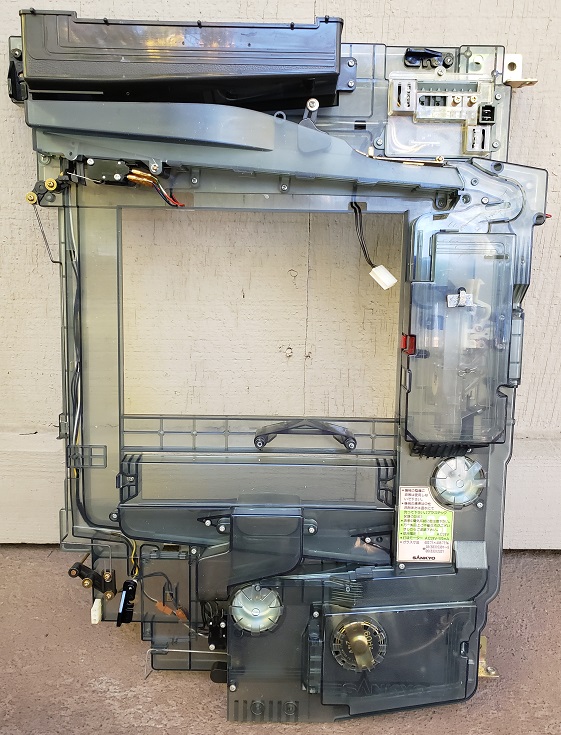
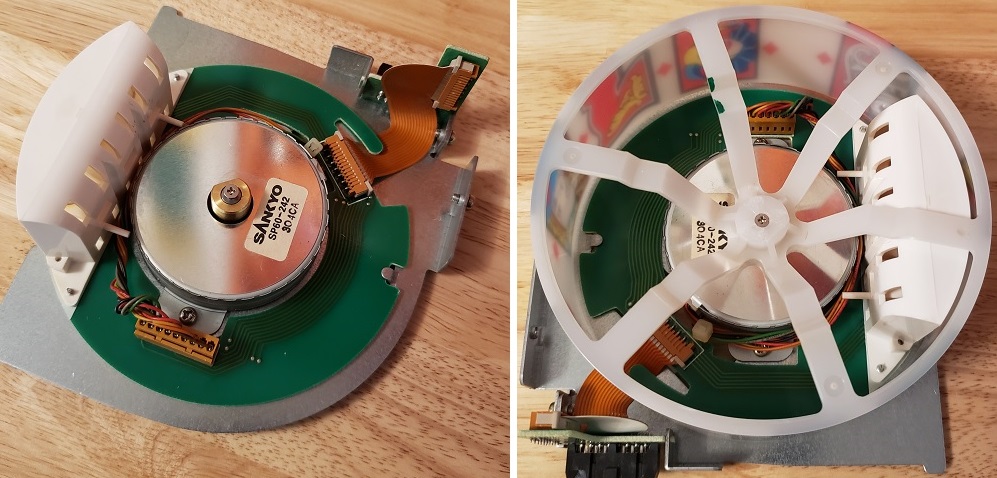
The Stellar
2000 frame uses a constantly running motor to trigger winning balls to
trip the jackpot releases, along with a couple cams and other
assemblies. This too was given full disassembly and
servicing. I also cleaned all the old grease out of the gearbox
and replaced it with high grade RC gear grease. If you pop the
gearbox open, be very careful not to lose the two tiny spacers that are
on two of the gear shafts. The whole thing is more or less a
slightly modern rework and combination of the jackpot and payout
mechanisms you'd find on a vintage machine.
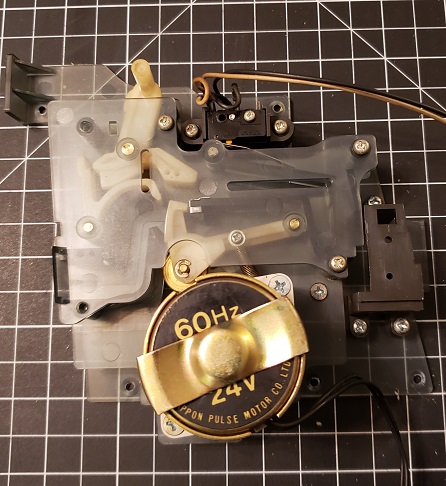
This is a pretty complex assembly with a lot of moving parts.
The back of
the frame as clean as I'll ever get it, reassembled front and back...
The objective
at this point was to get the machine to be clean enough where I felt
comfortable keeping it inside my apartment. It wouldn't have been
a big concern until I found all the ash in the front lower tray
plastics. After that I knew I needed to get the frame taken apart
and cleaned ASAP. I basically cleared my evenings after work for
a couple days to get it done as quickly as I could.
Next would be
cleaning the cell, giving it a full rebuild as well - everything with
the exception of pulling all the nails. Once I got the machine
back together again, I played it just a bit to ensure everything was
matched up correctly and noticed I also had a couple segments out in
the LED display inside the attacker door. At this point I would
have to wait a couple weeks until I had time to address the cell and
look into the LED issue.
Before I knew
it, the couple weeks had passed and I had the opportunity to get to
work on the cell over the course of a few days. I took everything
off with the exception of the nails and rails. I lack the facilities to
tumble the nails at present and they eventually cleaned up alright, as
did the playfield. Everything came off pretty smooth front and
back, all screws, just take your time.
The lighted
spinners were taken off and restored as well, but I found it less
hassle to do so with their wires still tacked in place. If you
attempt to disassemble and clean this type of lighted spinner, be very
careful as the E-clips are very soft and can deform very easily.
After all the sub-assemblies were pulled off I set them aside. I
decided to detail the playfield and nails first. It seems like
either the parlor where the machine operated, or possibly the exporter
decades ago, took some gold paint and painted over the nail
grime. I've seen vintage machines where full loads of ash int he
ashtrays were just sprayed over with silver paint, so I wouldn't be
surprised. After scraping that off the nails came out pretty
decent for remaining on the board. Down the road I can always
pull or polish them if it bothers me too much.
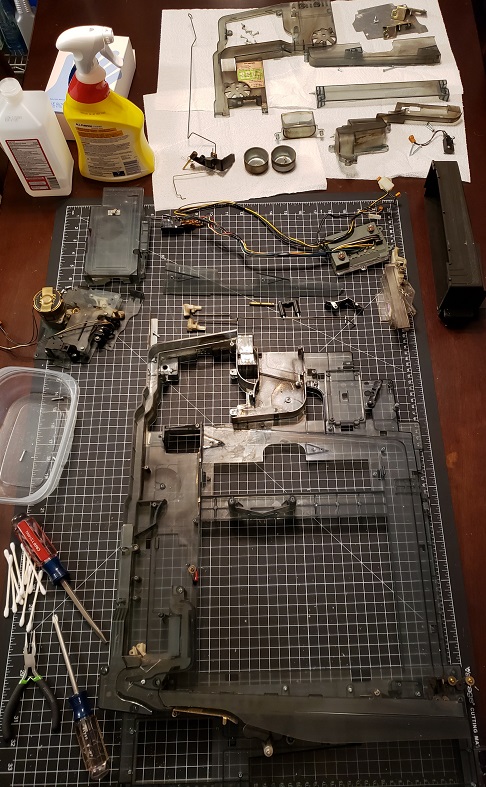
After that I
worked on one part at a time, completely tearing it down, giving
everything a full cleaning and washing - every part - and then
reassembling them into the cell.
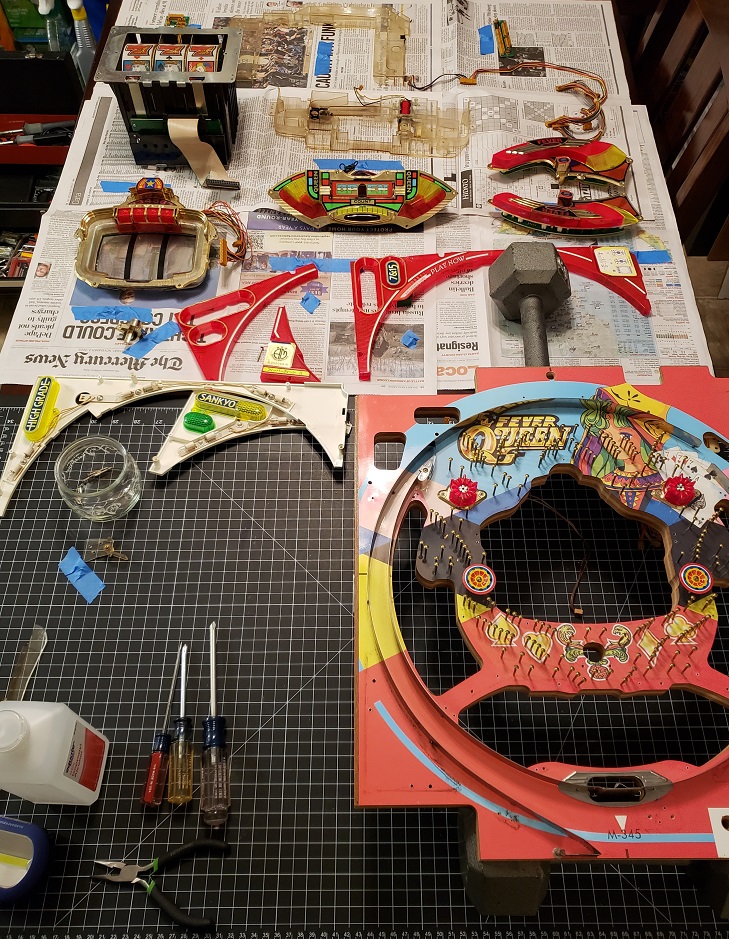
Every sub-assembly removed in
preparation for cleaning, the blue tape keeps the screws for each piece
together.
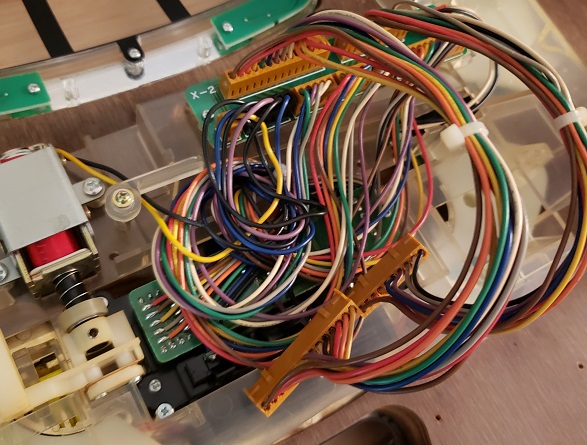
Everything is
pretty straightforward as long as you don't rush it. Pay
attention to how the wire looms at the bottom are stacked and folded,
as it gets pretty tight once sandwiched inside the frame. You
want to make sure they are all folded back the same way - taking a ton
of pictures helps with this. Every wire was also cleaned as I
went and every connector had its contacts cleaned as well.
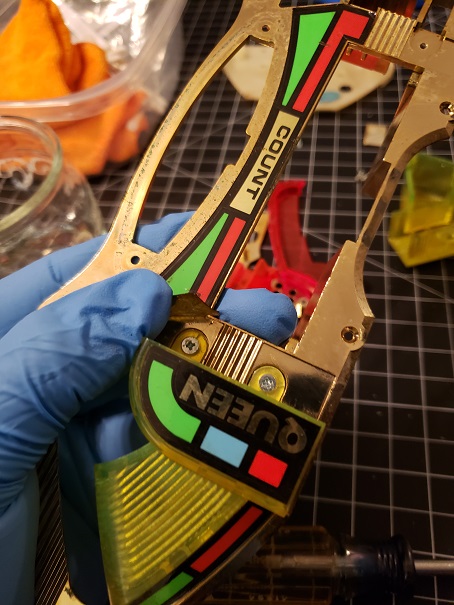
The one place
there are buried screws is on the "QUEEN" pockets at the bottom, their
screws are beneath stickers. These were positively filthy and
definitely needed to be scrubbed in the sink. The vinyl stickers are
actually very robust and are backed with clear plastic. You can
get a thin blade under the plastic and remove the smaller stickers and
peel the larger one back enough to get to the screw without damaging
anything. If you've ever removed the hood on an old Coleco
tabletop VFD arcade game where you have to peel the control panel
sticker back, this is exactly the same.
I reassembled
the cell as I went along, using pictures I took during the disassembly
to get everything back on in the proper order and positioning.
The repopulated cell, cleaned and rebuilt.
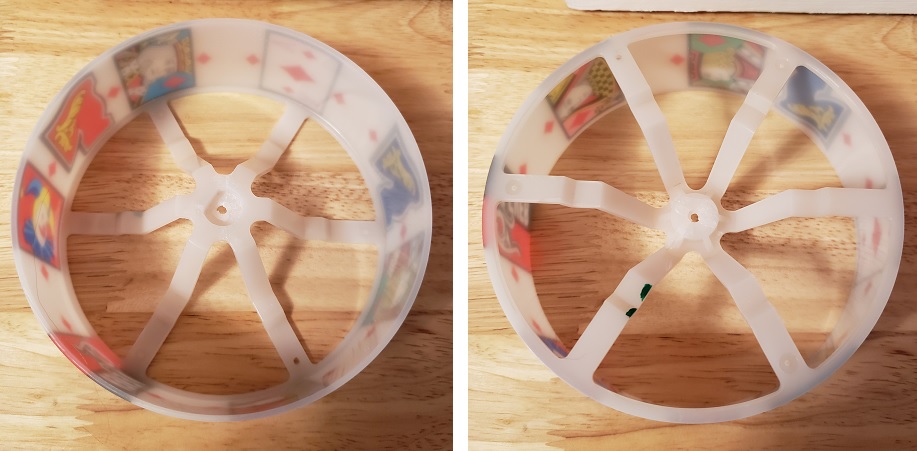
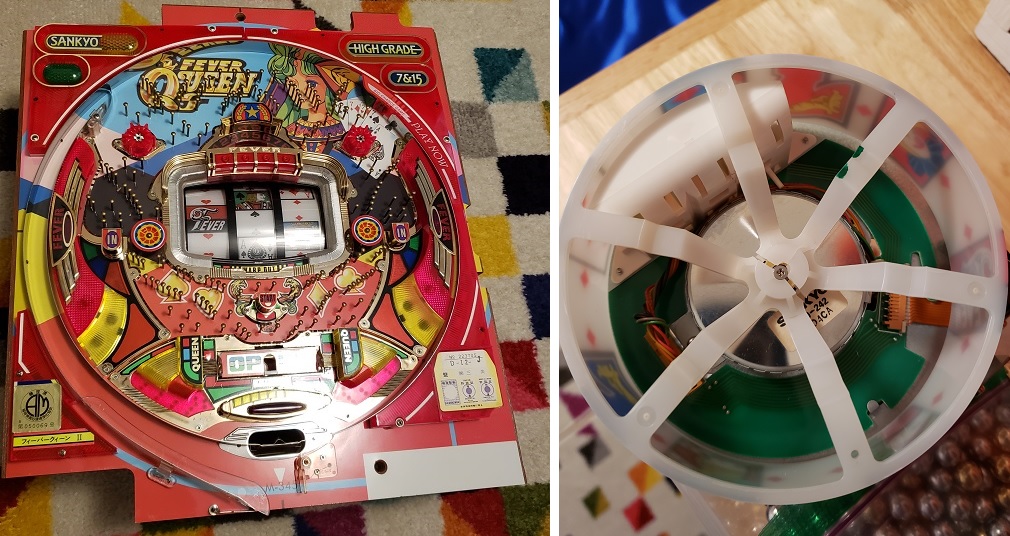
The reel
assembly is pretty interesting, basically just a miniaturized version
of a pachislo reel assembly. I believe the reels are optically
positioned but it looks like the optos are inside the stepper motors as
there's nothing external. These got fully cleaned as well, along
with a bit of contact cleaner in the motors as they felt grimy and
rough - in addition to making a bit of a rubbing sound when spinning in
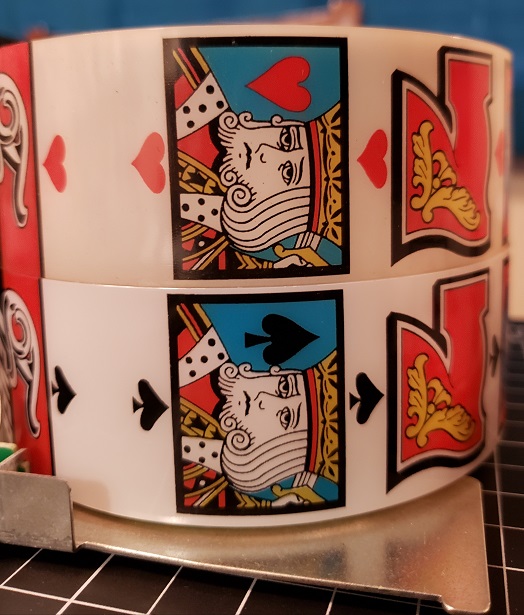
the machine. I thought the reels were a bit smoked intentionally
but no - they're pearl cream white! Here's a comparison of dirty
(hearts) and clean (spades) -
It's a bit
hard to see how bad they were originally as pachinko ALWAYS looks
cleaner in pictures, but trust me, they were caked with nicotine and
grime.
With that I
got all the ball races and wiring looms tucked back in and the reel
assembly reinstalled, completing the cell restoration.
As one can see, it's a really tight fit for the wiring looms at the
bottom, make sure they are folded properly.
Then it was
time to reunite it with the completely overhauled frame...
Now that's a clean vintage frame - especially compared to how it
started!
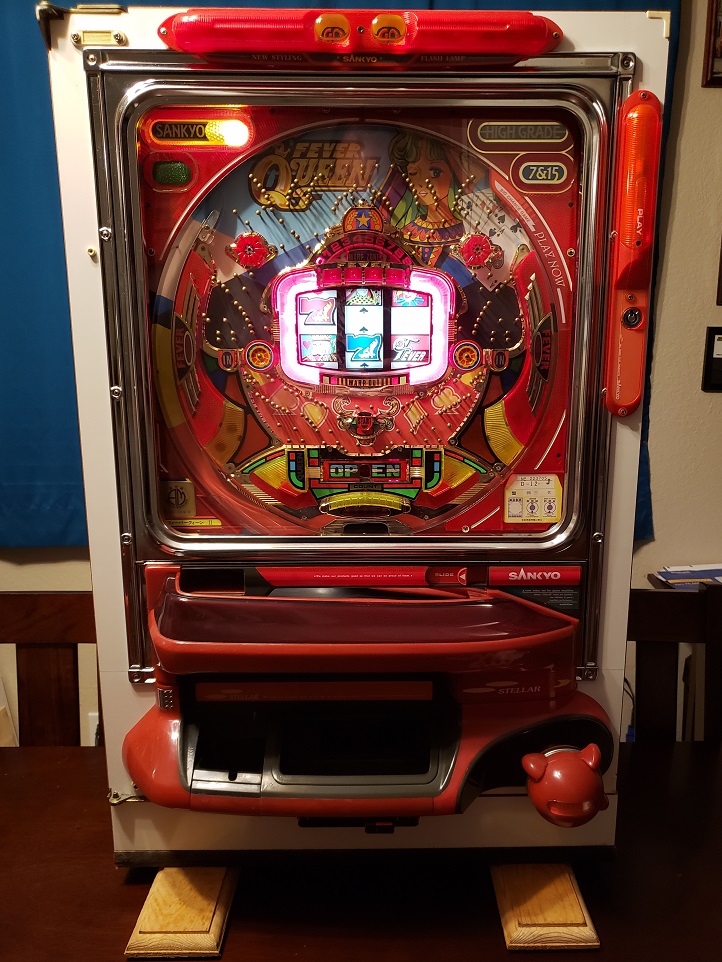
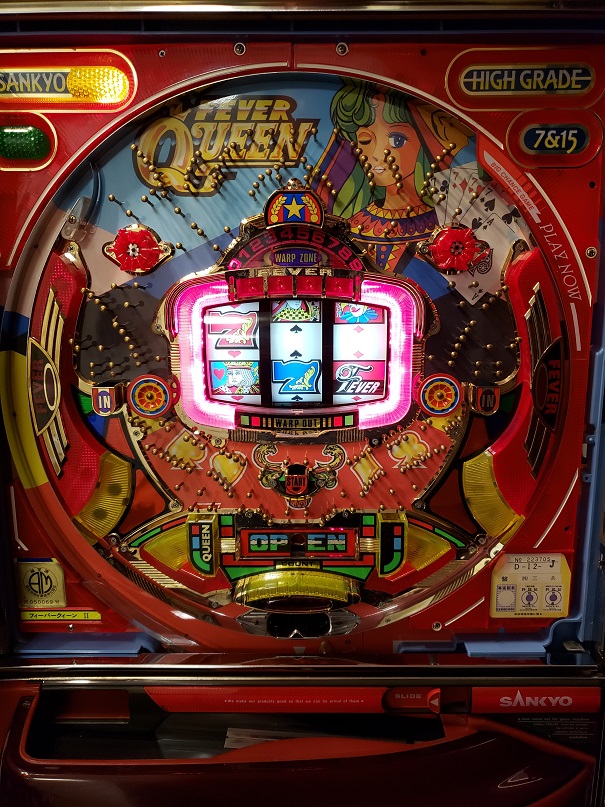
And done! An
absolutely beautiful machine and easily one of my favorites in terms of
theming and design.
The lamp
behind the green indicator at the upper right was burned out.
Unfortunately it was unmarked other than 28V. It took a bit of
searching but a CEC Industries #356
bulb is a suitable replacement. It's a sliver longer than
the stock bulb but the diameter, shape, everything else is spot on for
the 28V bayonet bulb the machine uses and fits fine. They're also
really cheap, I think I got a pack of 10 for less than $5.
There are a ton of lamps with very fragile wires all over the reel
assembly.
The only
problem with these machines that I've read about, this one included, is
the plastics are enameled with a foil coating. As the plastics
wore down from play, they became pitted and began to peel and flake
off. It seems to be an issue across the board, especially with
how popular this machine apparently was. Cleaning only makes this
worse but it had to be done, as I'd rather it come off more in cleaning
than get gummed up in the machine. I guess it's better than if
they were made of metal and rusted out.
There are actually a ton of lamps with fragile wires everywhere on this
machine!
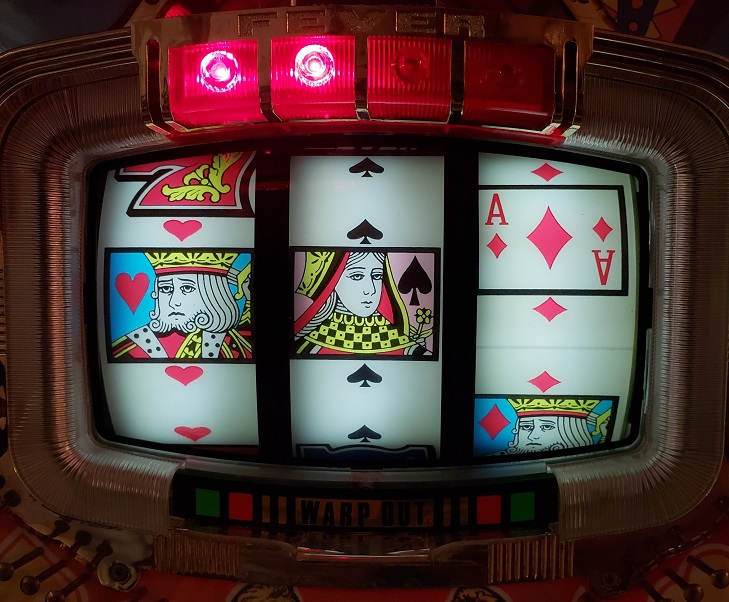
Giving the
machine a proper run-in couldn't have gone better, as I hit the Joker
Fever almost immediately. The machine worked like a champ through
all 16 rounds. These machines with the physical bells are crazy
during fever rounds - it's like bell fireworks! The transformer
was pretty hot after I was done, but I ran the machine for almost two
hours and there's a lot going on for a non-video machine: five
constantly running motors (shooter handle, payout motor, three reel
motors) a ton of incandescent bulbs everywhere, and what must be about
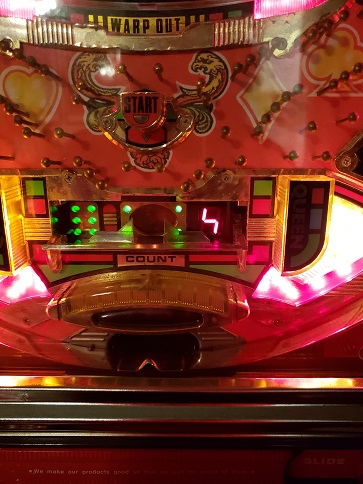
50 LEDs including a huge matrix behind the warp tunnels. The
transformer isn't labeled but it seems up to the task as performance is
without issue and it's pretty big. The reels are totally silent
now, so the cleaning remedied that.

Also the LED
counter display in the attacker door got itself sorted once I cleaned
everything! Dirty connections I'm sure but I wasn't sweating it
as it's connected with simple individual lines, so worst case I would
be able to troubleshoot or replace - but not necessary.
Honestly
that's the only caveat for this machine - there are a LOT of wires that
have to be folded up just right at the bottom to allow the back of the
frame to close without pinching anything. Only four sensors: one
to activate the reels, and then a left - center - right inside the
attacker. All payouts are manual, with the balls queuing up atop
hammers that are pushed by the rotating cams on the payout motor to
trip the jackpot mechs. The green light up top quickly flashes
when contact is made here, kind of like the flashing payout lights of a
vintage machine. On occasion a ball will hang out here waiting to
be pushed through the payout assembly and the light will remain
illuminated, for what I assume is an indication of a pending
payout. It always clears itself after a couple seconds though,
I'm guessing when this happens the ball just hasn't settled completely
to get pushed through.
For cleaning I
use my general three cleaners - 91% isopropyl alcohol, a bleach-free
Lysol multi surface cleaner, and Windex. Hitting most stuff with
the alcohol and then the Lysol is a one-two punch that cleans pretty
much anything without any damage. Parts that can be properly
washed go into the sink and scrubbed with a sponge, hot water, and dish
liquid. All connectors get treated with a plastic safe contact
cleaner, careful to catch any overspray or excess. And of course
WEAR GLOVES - it's incredible how fast I go through nitrile disposable
gloves, but my hands always thank me.
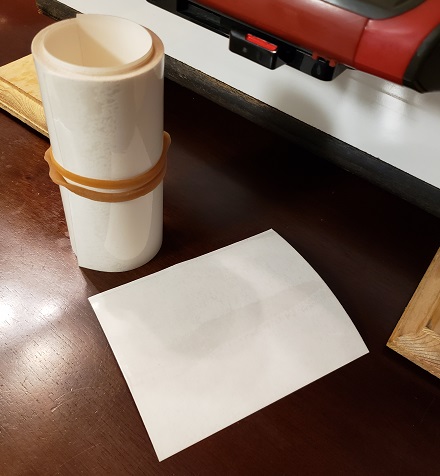
I also
dampened the speaker volume but not with a potentiometer as is
standard. The speaker cone and assembly are plastic on this
machine, not surprising for the simple audio, and I didn't want to hack
in an additional adjustment for something so simple. I took some
fabric and folded it up into a little pad, about 2" square, and put in
the lower door between the speaker and the speaker grille. It
dampens the audio perfectly on the lowest volume setting and has the
added benefit of keeping grime and whatever else from getting in the
open grille. I think the dampening / filtering like this benefits
this type of machine as the sound can be harsh during reaches / fevers
since that whole assembly is plastic against plastic, sounding into a
plastic enclosure.
At first I
forgot to clean the in-line fuse holder on the 24V connection between
the power block up top and the main PCB when I was doing everything
else. I noticed that if I moved that connection around I'd get
slightly intermittent power and sure enough that was the issue . Not
filthy or anything, just enough oxidation on the spring-loaded holder
terminals that needed to be cleaned off and it has been 100% stable
since.
I use cut to size adhesive Mylar from Marco Specialties but any pinball
supply should sell it.
The cladding
on the plastics was the last thing I needed to address. The gold
metallic areas on the attractions are all plastic with metallic foil
cladding. As the plastics wear down from impacts and ball erosion
during play, the cladding flakes off and becomes pitted. The
plastic erosion is especially bad on the left side of the upper part
(where the star is) and the left side of the reel surround. This
looks to be very common with these machines. On this machine some
of the missing cladding was touched in with gold paint, and I'd say it
was during its parlor life as there's obvious patina and ball trails
over it all. Cleaning broke the loosest bits of cladding off and
got the areas as good as they'd ever be.
I decided to
put a bit of pinball Mylar over these heavily traveled areas to protect
what was still there and preserve smooth ball action.
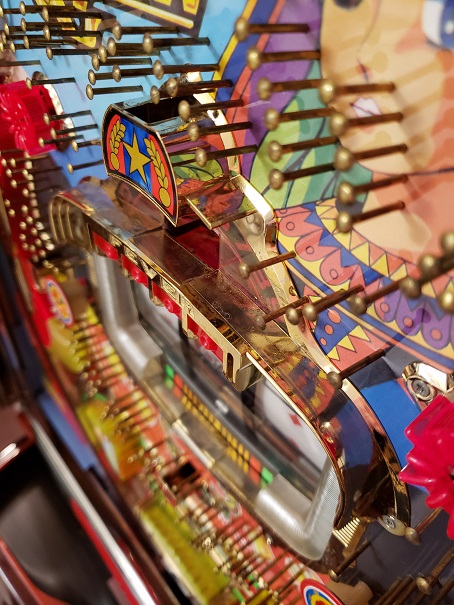
I put strips
on the cladding anywhere it was heavily traveled, starting with the
sides of the top target and the top of the reel attraction. The
key is to not "fill in" over places where there's supposed to be a
difference in height, the part that tilts back into the warp zone here
for instance.
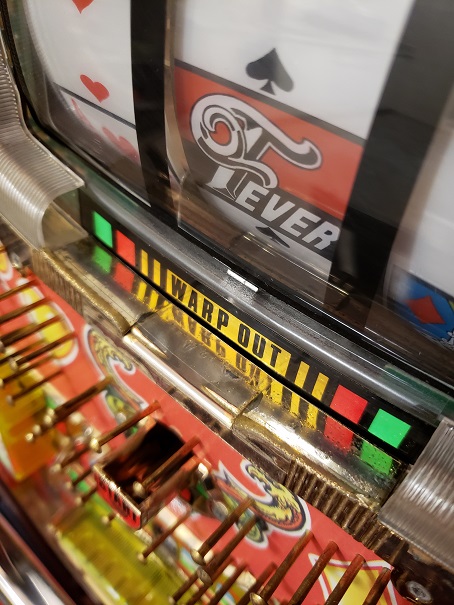
The warp out
area, careful not to disturb the natural ball pathway or action.
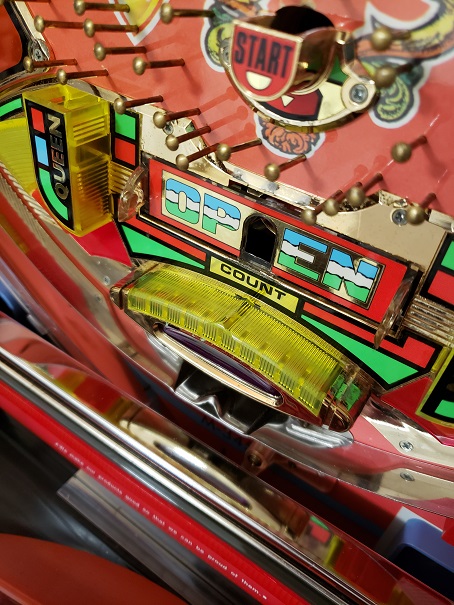
And the left
and right sides of the assembly at the bottom over the drain, as it was
surprisingly worn on the ends. I also did the sides, both outside
and inside, of the start pocket as not only had the cladding worn away,
the plastic had also become eroded fairly thin.
It all laid in
really nice, although I did take the reel attraction plastics and the
start pocket off to make it easier to apply. Ball action is super
smooth now, especially over the reels as there were a lot of pits that
would cause balls to loose momentum.
This is a
really fun machine. It pays out like crazy, there's constant
action, and it plays a really good balance between vintage and
modern. I can see why a lot of the retro pachi halls in Japan
seem to have one.
I still wish I
would have also kept the New Big Shooter as it was in spectacular
condition, and I know a lot of people would love to had the chance to
own a reasonably pristine Fever Powerful III (I find that machine boring
personally), but if I could again only pick one of the four machines -
it would still be Fever Queen II.
- - -
Reel Repair - 07/30/2024
Since restoring this machine I've moved twice and all my machines made
the trip both times without any damage. However while playing one
afternoon I noticed the right reel seemed to be slipping and jerking
around. I had seen this issue before in a thread on PachiTalk and
on a couple videos of retro pachinko parlors in Japan. Apparently
it's somewhat common for a Fever Queen II reel spoke to crack from
age. Figuring that was the case, I pulled the cell and removed
the reel cage assembly, then pulled the right reel.
Sure enough there was a crack in the reel but rather than it being a
cracked spoke, the center of the reel was split across at the mounting
screw. When I did the rebuild I made sure to nip up the screws
just enough to ensure they were completely seated. I do not
believe that I overtightened them, and I'm guessing the reel plastics
possibly either shrank a bit over the hub or expanded a little to where
the screw put too much pressure on it. Either way it needed to be
repaired.
I removed the reel and carefully mended the broken area with some
cyanoacrylate gel glue, as again I had seen it used for repairs on this
specific assembly. I also used the glue to reinforce the area
around the center where there were other hairline cracks.
Admittedly the glue did build up a bit of material that I needed to
gently file down but it did a pretty amazing job at mending the broken
area.
I also took a moment to spray a tiny bit of contact cleaner into the
reel motor and give the assembly an inspection. The repaired reel
fit back onto the reel motor hub without issue and once again I was
sure to tighten the mounting screw just enough to be seated
completely. While I had the reel cage out I figured I should pull
and inspect the other reels as well. They weren't broken but also
had hairline fractures beginning at the centers, so I'm guessing this
is simply something that will happen with these machines as they
continue to get older. I serviced the other reel motors as well
and gave the cage assembly a fresh cleaning while it was
unpopulated. Once everything was reassembled it was back to working
100%.
I've mentioned it previously but didn't have the best picture to
illustrate how tight the wiring looms are compressed between the cell
and frame at the bottom of the machine. I've seen this as a
failure point on other Fever Queen II machines, causing ball sensing,
attacker door, and fever counter display issues. Thankfully the
connections are all pretty easy to trace but if you have one of these
machines and are having these types of issues, this may be one of the
first places to look.
Funny enough this is the machine I play the most. There's just
something about its simplicity that appeals to me. In addition to
the constant action and continuous payouts, it has a very frantic pace
for a game of its vintage. A game where the reaches are all basic
reel spins may sound uninteresting but for whatever reason I am always
engaged in the outcome, and I find it more difficult to predict than a
standard digipachi with a video screen.
It's also an extremely popular machine that was made for a long time
and in huge quantities, so there are a lot of them out there. If
you're interested in this era of pachinko I'd recommend it as a machine
to keep a lookout for. Additionally the modern versions continue
to have multiple releases and should be relatively easy to source
through currently active pachinko importers. The newer versions
retain the large physical reels and most of the audio and visual style
of the original, except they offer more modern gimmicks in terms of
reel
movement and reaches.
- - -
Last updated
07/30/2024
If you have
questions or comments about pachinko or pachislo, you
can contact me here.
- - -
- - -
Page
Content and Graphics
Copyright 2023-2024 ClassicPlastic.net