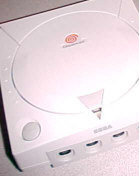
 [Mod
Files] Dreamcast tapping composite from a Performance
RFU adapter.

 [Mod
Files] Dreamcast tapping composite from a Performance
RFU adapter.
I get asked every now and then about how I come up with the mods I perform. Most of the time the mod work comes from necessity. A good example of this is the JVC X'Eye disc lid pinswitch repair, without it the CD functionality on my JVC X'Eye would be unusable. Sometimes it's because of an annoyance that slowly picks at me over a period of time. Figuring out how to switch the cartridge slot on the JVC X'Eye to JPN mode is a good example in this case. With the larger cartridge slot I really wanted to use it to play region locked Japanese Mega Drive games. I knew it had to be possible and after some research and development I was able to write a definitive mod tutorial. Then of course there are the mods that we do because they're in demand and useful, such as Saturn region switches. Lastly are the times when I'm bored and have something sitting in the back of my head, that's where this came from.
Most of the time now days when I find a Dreamcast console it is missing the original AV cable. If there is even some kind of output cable, it's generally the horribly cheap third party RFU adapter that Performance sold. These are notoriously bad, output an ugly picture, and wreak havoc with any coaxial signal being passed through them. Just the same, I think there are more of these RF boxes out there than any other RF box for the Dreamcast. I had a Dreamcast that came with one of these boxes that was worse than any other I had come across. Turned out the grounding for the coaxial lead had broken loose. I fixed it but even when working properly, it still looked horrible. Looking at the internals of the adapter I began to think of ways I could turn it into an AV cable. A few days later I had some spare time on my hands so half an hour and one set of RCA cables later, I had composite video and dual mono audio from a Performance RFU adapter. Of course this mod is kind of pointless since every Dreamcast had an AV cable in the box. However with how infrequently I find them with the systems, this mod makes perfect sense - after all, we all have bags of short RCA cables we've accumulated over the years.
But first, our disclaimer... Please, make sure to read each project through completely before beginning or purchasing any new items, David's Video Game Insanity!! will not be held responsible for any damages incurred during modification of your video game systems or items. Remember, in most instances opening or adding / removing components will void your manufacturer's warranty. Before a project is listed it's gone though several times to ensure that it is safe to perform, however, modify your video games at your own risk.
Let's begin. There aren't any screws that hold the performance RFU adapter together. Instead both halves of the shell are joined by a series of clips on the top and bottom. Take a flat head screwdriver and carefully pry them apart from the sides.
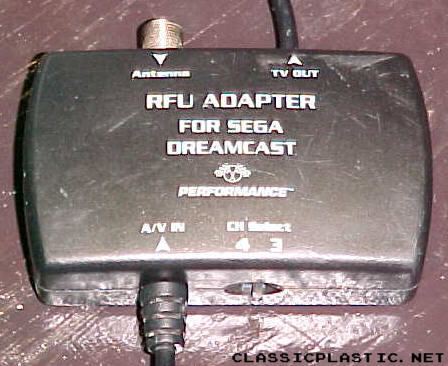
Take the board out and flip it over so that the lead from the Dreamcast is facing away from you and you should see this...
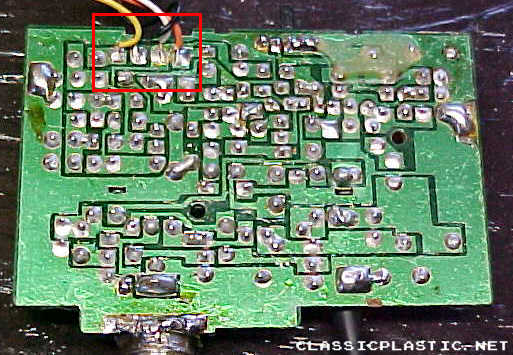
The area with the red box around it is where the cable from the Dreamcast interfaces with the RFU board. This is also where our work will concentrate. There may be some hot glue over the connections, if there is carefully peel it off. Those wires are awfully small aren't they? Hmm.. wonder why the signal is so poor once shoved through the RF modulator. The four wires work out to carry the following signals...
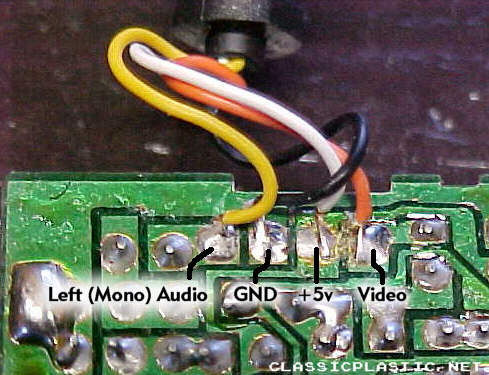
The first cable runs to the left audio output of the Dreamcast. Since RF is mono only, this is the only audio lead that the cable carries. This means that you can't get stereo sound from this hack but you can get dual mono and anything is better than the RF audio. The ground connection interfaces with a ground back in the Dreamcast. +5v is drawn from inside the Dreamcast as well. Why is there a +5v connection? Simple, it's used to power the RF modulation circuitry. The final wire runs to the composite video out inside the Dreamcast. The basics here are to tap the video and mono audio connection for direct usage. I used a set of standard RCA cables (Ye/Wh/Re), cut off the plugs on one end, and stripped them. The wires on the outside of the center wire are the ground connections. They should be wound together and soldered. Then strip the center wire and tin it as well.
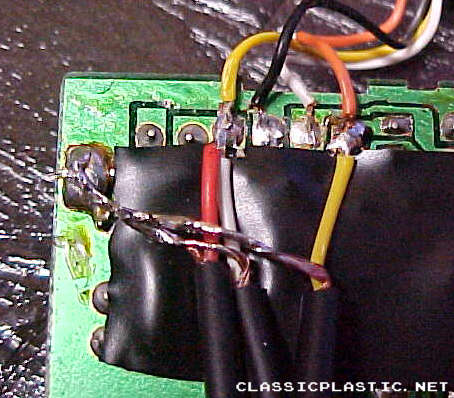
I put a piece of electrical tape beneath where I'm going to work so I don't have to worry about shorting anything out. The lead for the video cable connects to the pad where the video lead from the Dreamcast connects to the RFU board. Be careful as the original leads are just soldered in place, they are not threaded through the board. The leads from both the left and right audio cables connect to the mono pad on the RFU board. While this won't give you stereo sound, it will produce dual mono so at the very least mono audio will come out of both speakers. This is as good as you can do with the audio off of this lead cable and it's still far better than RF. All the grounds are tied together and then grounded. The ground lead from the Dreamcast could be used but it's easier to just use a local ground, in this case the ground connection to the RFU adapter's shielding. (the big blob of solder to the far left) You could also get rid of the RFU board completely and connect directly to the cable leads from the Dreamcast alone, but with those thin wires I find this a more secure solution.
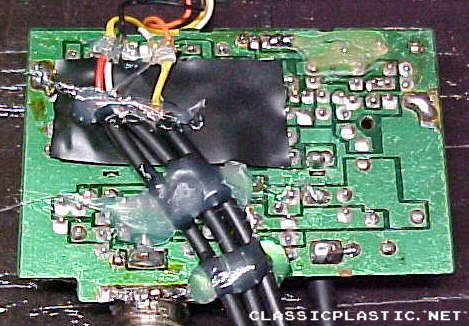
Secure everything down with some hot glue. Also make sure to but a bead back over where the wires connect to the board. I usually push the glue down with my fingertips just before it cools to make sure it's curved over the wires as close as possible to provide the tightest clearance. Yes, my fingerprints are all over my mods and hacks. If the glue is just about to set, it won't stick to your fingers, yet will still be lightly pliable. Then cut a hole in the case where the composite wires will leave. You may need to make a little room inside the shell for the new wires to fit but it's nothing drastic.
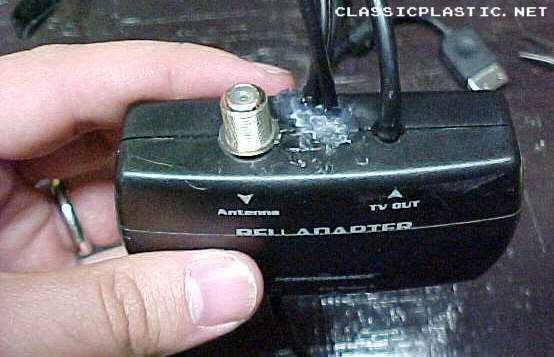
Then secure the wires with some more hot glue. This time I kept touching the setting glue with my fingers by mistake which made it turn into a mess. I went back and cleaned it up with an xacto knife however. What's nice here is now you have composite video and composite dual mono, but if for some reason you wanted horrible quality RF, you could still get it from the same box! Don't know why anyone would though.
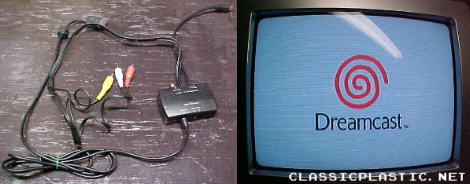
The finished cable is pictured here.
As you can see I used a set of short RCA cables for the hack. I have
tons of these from years of electronics purchases as well as working electronics
retail. Most people will have at least one spare set of these and
nearly anyone that would do a hack like this probably has a few.
Hey, it's something to do with those insanely short two foot long AV cables
that come packaged with most DVD players. I can't think of many other
things to use them for. Maybe some kind of bondage game? I
don't know. As you can see the hack works perfectly, nice clear composite
video and dual mono audio. While it's not as nice as a straight composite
AV cable, it's still a thousand times better than RF - especially the extremely
poor RF signal that this particular brand of RF box is known for.
With how frequently Dreamcast's I pick up come with these RFU boxes and
nothing more, this hack makes them easier to resell. Even better
it's done using parts on hand and only takes a few minutes. Do make
sure to change the Dreamcast internal audio setting from Stereo to Mono
however.
The tools needed for this modification
are:
1 flat head screwdriver
1 soldering iron (low wattage or variable)
Rosin core solder
1 set of RCA composite cables (Ye/Wh/Re)
Written on 10-25-06 by David, insanedavid@classicplastic.net