 [Mod
Files] Dreamcast changing your Dreamcast shell.
[Mod
Files] Dreamcast changing your Dreamcast shell.

[Mod
Files] Dreamcast changing your Dreamcast shell.
The Sega Dreamcast will go down in history for being a gamer's machine. It didn't play DVD's, it didn't try to be an all in one jukebox, and it certainly didn't attempt to be the media center for your home. What it did do however was play some incredible games that many say the following generation of consoles are just now starting to surpass some four years later. Dreamcast consoles and most of the accessories threw out the dark colors of consoles of the past and were molded in violet gray, done so to prevent fading and yellowing that pure white would have caused. However as with nearly all the modern consoles, one day you may want to do a little something different with this juggernaut of a game machine. Well in the case of the Dreamcast it's a lot easier than one might initially assume.
But first, our disclaimer... Please, make sure to read each project through completely before beginning or purchasing any new items, David's Video Game Insanity!! will not be held responsible for any damages incurred during modification of your video game systems or items. Remember, in most instances opening or adding / removing components will void your manufacturer's warranty. Before a project is listed it's gone though several times to ensure that it is safe to perform, however, modify your video games at your own risk.
Okay, to begin you're going to need to purchase a replacement Dreamcast shell. The ones Sega sold in the past are exactly the same as the original (used for official repairs) so that's not what you're going to want. The Dreamcast replacement shells you want are made by third party manufacturers, usually ones out of the mainstream that do most sales overseas. I suggest checking your local import stores or online for replacement console shells, remember they are NOT manufactured by Sega, but they work just fine.
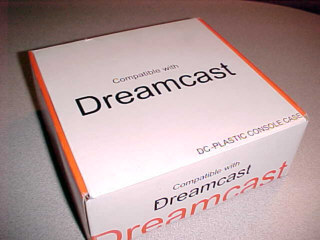
This is how many Dreamcast replacement
shells will come, most are called "DC-plastic console case" but most import
stores will list them as replacement shells. Most of the time the
box will look like a knock off of a Sega designed product and have very
little outer markings.
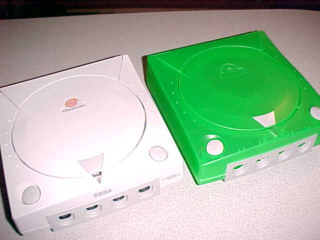
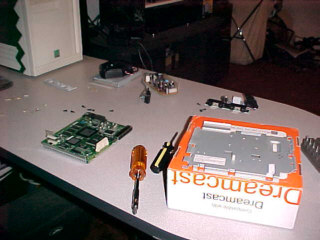
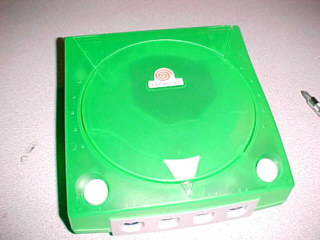
Here we go, time to transfer the contents
of the factory original Dreamcast on the left to the replacement shell
on the right. For this particular mod walkthrough I've purchased
a translucent dark green shell. The Dreamcast replacement shells
come in many translucent colors such as red, blue, clear, lime, yellow,
green, and more! They come with everything including a replacement
controller socket plate, already installed open and power buttons, all
the lid gears and spring system, the inner foam insert to brace the disc
drive assembly, the power light amplifier, and a modem cover. What
it doesn't come with are any screws, Dreamcast internal parts, or the Dreamcast
swirl sticker - all of which will be transferred from your original Dreamcast.
I do want to say to be gentle when screwing the Dreamcast components into the replacement shell. Make sure the parts are attached securely but be very careful not to over tighten anything as you will damage the screw holes and standoffs of the new shell.
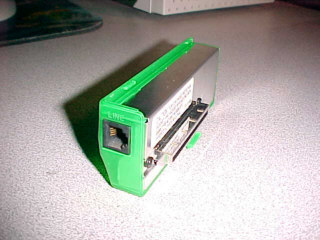
First things first, remove your Dreamcast
modem from the side of the console and unscrew the three small screws that
hold the outer plate on. It should slide off easily. Then all
you do is replace it with the new modem plate from the replacement Dreamcast
shell using the same screws, it's easy as that.
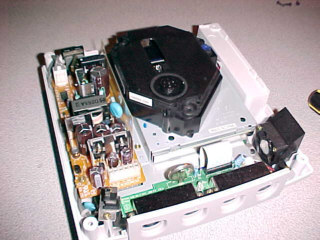
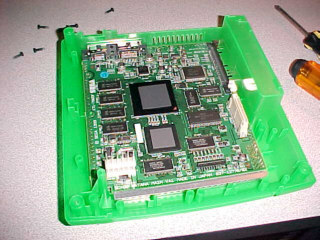
Make sure to completely power down and
disconnect your Dreamcast. Then flip your Dreamcast over and remove
the screws at the base, the top should now easily lift off revealing the
internals. It may look really complex (and it is) however the whole
thing easily comes apart with nothing but an ordinary screwdriver.
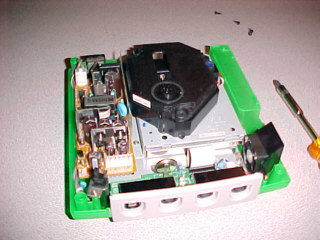
Just start at the top and work your way down, the Dreamcast is built like
a stack of layers, take your time and begin to work to the bottom - setting
each part aside as you head downward.
Be careful when removing the fan since
it's attached to the Dreamcast mainboard with some extremely thin wires
and there is a chance it may break off if abused. Also pay special
attention on not placing too much stress on the controller ports.
You may also want to spray the internals out with a can of compressed air,
removing any dust before moving on.
As you remove all of the components be
sure to set them aside and have a large work area so you don't lose any
screws or drop any components. You may want to keep the screws together
with each layer that they came from. Once you're done with that set
the old Dreamcast shell aside and open up your new one. You're going
to reassemble the Dreamcast in the new shell starting from the bottom up.
Start with the metal shielding from the
bottom and start stacking and screwing down each component as you did when
you disassembled everything. Just go slow and be sure to take your
time, don't force parts into place, if something won't fit then
you're probably putting it back in the wrong order.
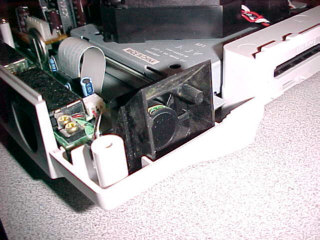
Eventually you'll get to this point, with
everything in place. Very carefully set the replacement top onto
the rest of the console. I recommend doing this with the lid open.
This will ensure that the lid sensor doesn't get mangled as you seal up
the case. Once the top is resting back on the Dreamcast, carefully
close the lid. If you feel any unnatural resistance, stop and take
the top of the shell off, you may have something in the way of the lid
assembly or have the top on askew. Clear any blockage, realign the
top half of the shell and close the lid once more. Once the lid is
closed, hold the two halves together and turn the entire system over.
Replace the screws from the bottom and slide the modem back into place.
Now you will need to pull the Dreamcast
swirl medallion from the original console shell, you can pry it off by
hand but I recommend using a butterknife to get underneath. It should
still be quite sticky so simply press it down onto the new shell and your
mod is complete.
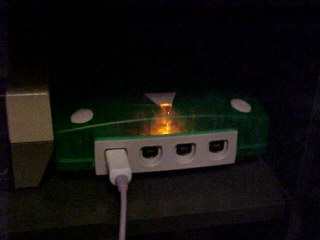
The translucent shells give a cool internal
glowing effect from the power light when in the dark, so this mod is almost
like installing a light kit as well.

Additionally you can now see the disc
spin when inside the console, which is another added visual flair.
When you're done it'll look like you spent some serious time and money
modifying your console, when all you did was swap the case.
The most important part of this mod is
taking your time and keeping all the parts together. This is similar,
although a little easier, to the PlayStation color shells from years ago.
Shortly after originally writing this tutorial back in 2004, Dreamcast
shells all but disappeared from sale. This was the same thing that
happened with original PlayStation color shells a few years before that.
If you can find a Dreamcast replacement shell these days, consider yourself
to be lucky. The last few I I saw on eBay were near the $200 mark
for the shell alone. Those last ones I saw for auction were a blue
and a red one but that was back around 2008 if I remember correctly.
The other thing was if your were to order a shell from an importer it was
always a mixed bag which color you would get, no matter how many you ordered.
The tools needed for this modification
are:
1 phillips head screwdriver
Written on 10-29-04 by David, insanedavid@classicplastic.net
Last amended 02-02-11 by David, insanedavid@classicplastic.net